Building your own desktop PC can be a rewarding experience, offering better performance, customization, and cost savings compared to pre-built systems. Whether you’re a gamer, content creator, or power user, this step-by-step guide will help you assemble a high-performance PC efficiently.
## **Table of Contents**
1. **Planning Your Build**
– Setting a Budget
– Choosing the Right Components
– Compatibility Considerations
2. **Essential Components**
– CPU (Processor)
– GPU (Graphics Card)
– Motherboard
– RAM (Memory)
– Storage (SSD/HDD)
– Power Supply (PSU)
– Cooling System
– PC Case
3. **Tools You’ll Need**
4. **Step-by-Step Assembly Guide**
– Preparing the Workspace
– Installing the CPU
– Installing RAM
– Mounting the Motherboard
– Installing Storage Drives
– Installing the Power Supply
– Installing the GPU
– Cable Management
– Final Checks
5. **Powering On and BIOS Setup**
6. **Installing the Operating System**
7. **Performance Optimization Tips**
8. **Troubleshooting Common Issues**
9. **Conclusion**
—
## **1. Planning Your Build**
### **Setting a Budget**
Before buying components, determine your budget. A fast gaming or productivity PC can range from **$800 to $3000+**, depending on performance needs.
– **Budget ($800-$1200):** Mid-range CPU (Intel Core i5 / AMD Ryzen 5), mid-tier GPU (NVIDIA RTX 3060 / AMD RX 6700 XT), 16GB RAM, 1TB SSD.
– **Mid-Range ($1200-$2000):** High-end CPU (Intel i7 / Ryzen 7), powerful GPU (RTX 4070 / RX 7800 XT), 32GB RAM, fast NVMe SSD.
– **High-End ($2000+):** Top-tier CPU (Intel i9 / Ryzen 9), flagship GPU (RTX 4090), 32GB+ RAM, multiple SSDs, liquid cooling.
### **Choosing the Right Components**
Each component affects performance. Prioritize based on your use case:
– **Gaming:** Focus on GPU > CPU > RAM > Fast Storage.
– **Content Creation (Video Editing, 3D Rendering):** CPU > RAM > GPU > High-Capacity Storage.
– **General Productivity:** Balanced CPU, 16GB RAM, SSD for speed.
### **Compatibility Considerations**
– **CPU & Motherboard:** Ensure socket compatibility (e.g., Intel LGA 1700 / AMD AM5).
– **RAM:** Check motherboard support (DDR4/DDR5, speed).
– **GPU & Case:** Verify GPU length fits inside the case.
– **PSU Wattage:** Ensure enough power for all components (use a PSU calculator).
—
## **2. Essential Components**
### **1. CPU (Processor)**
The brain of your PC. Top picks:
– **Intel:** Core i5-13600K (mid-range), i7-13700K (high-end), i9-13900K (extreme).
– **AMD:** Ryzen 5 7600X (budget), Ryzen 7 7800X3D (gaming), Ryzen 9 7950X (workstation).
### **2. GPU (Graphics Card)**
Critical for gaming and rendering:
– **NVIDIA:** RTX 4060 Ti (1080p), RTX 4070 (1440p), RTX 4090 (4K).
– **AMD:** RX 7600 (budget), RX 7900 XT (high-end).
### **3. Motherboard**
Choose based on CPU socket and features:
– **Intel:** Z790 (overclocking), B760 (budget).
– **AMD:** X670E (high-end), B650 (mid-range).
### **4. RAM (Memory)**
– **16GB (Minimum for gaming), 32GB (Ideal for multitasking), 64GB+ (Workstations).**
– DDR5 (newer builds) or DDR4 (budget-friendly).
### **5. Storage**
– **NVMe SSD (Fastest):** Samsung 980 Pro, WD Black SN850X.
– **SATA SSD (Budget):** Crucial MX500.
– **HDD (Mass Storage):** Seagate Barracuda (2TB+).
### **6. Power Supply (PSU)**
– **80+ Gold (Efficient), 750W+ for mid-range, 1000W+ for high-end builds.**
– Reputable brands: Corsair, EVGA, Seasonic.
### **7. Cooling System**
– **Air Coolers:** Noctua NH-D15 (best air cooling).
– **Liquid Coolers:** Corsair iCUE H150i (360mm AIO).
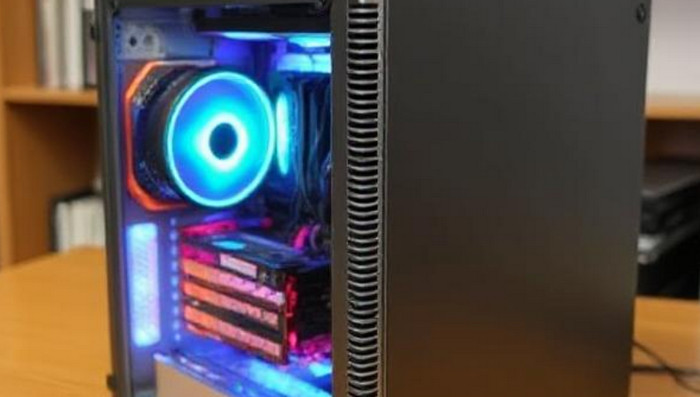
### **8. PC Case**
– **Airflow-focused:** Lian Li Lancool 216, Fractal Design Meshify C.
– **RGB & Aesthetics:** NZXT H7 Flow, Corsair iCUE 4000X.
—
## **3. Tools You’ll Need**
– Phillips-head screwdriver
– Anti-static wrist strap (optional but recommended)
– Zip ties (for cable management)
– Thermal paste (if not pre-applied on cooler)
—
## **4. Step-by-Step Assembly Guide**
### **Step 1: Prepare the Workspace**
– Work on a clean, flat surface.
– Ground yourself to avoid static damage.
### **Step 2: Install the CPU**
1. Open the motherboard socket lever.
2. Align the CPU (match the golden triangle/notch).
3. Gently place it in, then lock the lever.
### **Step 3: Install RAM**
1. Open RAM slots’ clips.
2. Align the notch and press firmly until it clicks.
### **Step 4: Mount the Motherboard**
1. Install I/O shield into the case first.
2. Screw in standoffs (match motherboard holes).
3. Secure the motherboard with screws.
### **Step 5: Install Storage Drives**
– **M.2 SSD:** Insert into the M.2 slot, secure with a screw.
– **SATA SSD/HDD:** Mount in drive bays, connect SATA & power cables.
### **Step 6: Install the Power Supply**
1. Place PSU in its bay (fan facing down if case has a vent).
2. Connect 24-pin (motherboard), 8-pin (CPU), and PCIe (GPU) cables.
### **Step 7: Install the GPU**
1. Remove case PCIe slot covers.
2. Insert GPU into the top PCIe x16 slot, secure with screws.
3. Connect PCIe power cables.
### **Step 8: Cable Management**
– Route cables neatly behind the motherboard tray.
– Use zip ties to secure loose cables.
### **Step 9: Final Checks**
– Ensure all connections are secure.
– Double-check CPU cooler, GPU, and RAM seating.
—
## **5. Powering On and BIOS Setup**
1. Connect monitor, keyboard, and power.
2. Power on, enter BIOS (usually **DEL/F2/F12**).
3. Enable **XMP/DOCP** for RAM speed.
4. Check boot order (set SSD as primary).
—
## **6. Installing the Operating System**
1. Create a bootable USB (Windows Media Creation Tool).
2. Boot from USB, follow installation prompts.
3. Install drivers (motherboard, GPU, etc.).
—
## **7. Performance Optimization Tips**
– **Overclocking (if supported):** Boost CPU/GPU speeds cautiously.
– **Undervolting:** Reduce power consumption while maintaining performance.
– **Update BIOS & Drivers:** Ensures stability and performance.
—
## **8. Troubleshooting Common Issues**
– **No Power:** Check PSU connections, power switch.
– **No Display:** Reseat GPU, check monitor input.
– **Overheating:** Improve airflow, reapply thermal paste.
—
## **9. Conclusion**
Building a fast desktop PC is a rewarding project that offers superior performance and customization. By carefully selecting components, following assembly steps, and optimizing settings, you can create a powerful machine tailored to your needs. Happy building!
Would you like recommendations for specific builds (gaming, editing, etc.)? Let me know!